
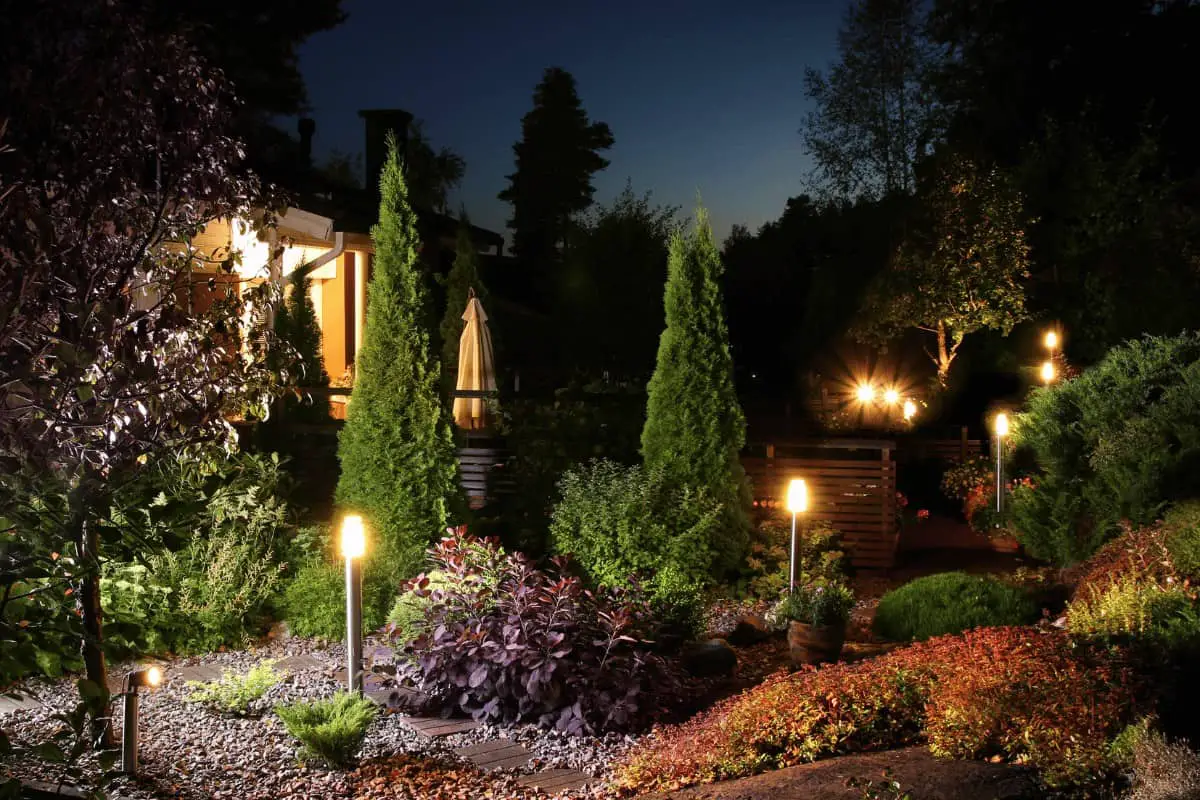
Garden lighting can make a huge difference to your outdoor space. It not only adds an aesthetic element to your garden but also provides practical benefits that can enhance your outdoor experience. In the article, Why Install Garden Lights? The Benefits of Garden Lighting. We’ll discuss the various benefits of garden lighting and why you should consider installing it in your own garden.
Why Install Garden Lights?
There are several reasons why you might want to install garden lights in your outdoor space. Firstly, garden lights can provide additional security by illuminating your property and deterring potential intruders [3]. Additionally, garden lights can enhance the aesthetic appeal of your outdoor space and add to its overall beauty [1].
Furthermore, garden lights can improve the functionality of your outdoor space, allowing you to use it well into the evening and night. This can be especially beneficial for hosting outdoor events and gatherings, allowing you to create a warm and inviting atmosphere for your guests [2].
Benefits of Garden Lighting
- Increased safety and security: Garden lights can help to deter potential intruders by illuminating your property and highlighting any unusual activity.
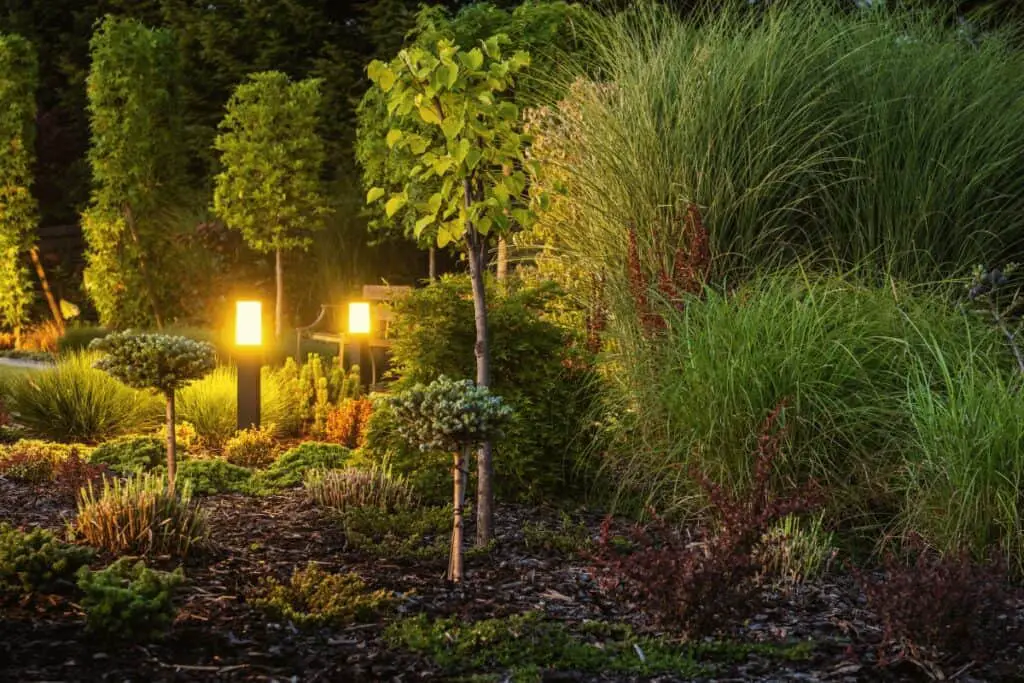
- Improved aesthetics: Garden lights can enhance the visual appeal of your outdoor space, making it look more attractive and inviting.
- Increased functionality: Garden lights can allow you to use your outdoor space well into the evening, creating a warm and inviting atmosphere for outdoor events and gatherings.
- Energy-efficient: Many garden lights are solar-powered, which means that you can save on energy costs while also helping to protect the environment.
- Adds value to your property: Professionally installed garden lighting can increase the value of your property, making it more attractive to potential buyers.
installing garden lights can provide a range of benefits for homeowners, including increased security, improved aesthetics, and enhanced functionality.
With a variety of energy-efficient options available, garden lighting can also be a sustainable and cost-effective choice for your outdoor space.
Choosing the Right Garden Light
MEIKEE 7W LED Landscape Lights

12V 24V IP66 Waterproof Wall Lights 2-in-1 Outdoor Low Voltage Warm White Garden Lights Outdoor Spotlights Path Lights for Yard Lawn Patio (8 Pack with Connectors)
- Updated 7W Landscape Lights with Connectors
- Low Voltage Landscape Lights
- Material Upgrade Protection Upgrade
- Rotatable & Flexible Angle Adjustment
Installing garden lights can enhance the look and feel of your outdoor space, and provide several benefits such as increasing the security, visibility, and overall appeal of your garden. However, it is important to plan the installation process properly in order to achieve the desired results. Here are some insights on planning garden lighting based on the provided search results:
Where to install garden lights: According to gardeningetc.com, water features like rills, water chutes, bubbling jets, and tranquil ponds can provide endless opportunities to experiment with different types of lighting and create different effects [1].
Homesandgardens.com also suggests four different methods of lighting spaces in your garden: uplighting, downlighting, backlighting, and spotlighting. Spotlights are useful to draw attention to a particular object from above, whereas uplighting happens from below [2].
Types of Garden Lights
Types of garden lights: The type of garden lights you choose will depend on the desired effect and function of the light. Homesandgardens.com suggests outdoor ambient lights, flood lights, and pool lighting ideas. These lighting fixtures may require an electrician to install, as they will require adding a new power supply to the exterior of your home [2].
Additionally, Kichler.com highlights the importance of professional outdoor and landscape lighting, which can add value and increase usability to outdoor living spaces. This can include highlighting design elements, creating a larger space, and providing security [3].
Where to Install Garden Lights
Choosing the right garden light: Consider the desired effect and function of the light. Solar-powered garden lighting is becoming more popular due to its energy efficiency and environmental benefits [1]. Homesandgardens.com also advises checking that new lights are safe and up to local codes.
Additionally, homedepot.com provides a step-by-step guide for wiring garden lights, which can be helpful for those choosing to install the lighting themselves [3].
Planning garden lighting should involve carefully considering where to install the lights, what types of lights to use, and which lights will best serve the function and aesthetic of the outdoor space. Whether installing lights oneself or hiring a professional, careful planning can ensure the best results.
Tools and Materials
To install garden lights, you’ll need a few tools and materials. Here are some recommended ones, based on the provided web search results:
- Garden Rake: A garden rake or ground rake is used for smoothing out the compost or for raking the soil level to create a beautifully crumbly seedbed [1]. You’ll need this tool to level the ground where you plan to install your garden lights.
- Hand Pruners or Pruning Shears: If you need to cut wires or trim plants to make way for your garden lights, a hand pruner or pruning shear is recommended. In fact, some consider it the most essential gardening tool [1].
- Metal Bow Rake: To move and level soil and prepare your garden bed, you’ll need a metal bow rake, also called a soil or landscape rake. It is different from a leaf or lawn rake; its short, sturdy, forged steel tines are spaced one or two inches apart. These rakes come in different widths. A width of 24 inches works well for most jobs [3].
- Shovel: A shovel is recommended to dig holes for your garden lights’ fixtures and wiring.
- Wire Cutters: To cut and strip wires, you’ll need wire cutters. These come in different sizes and strengths, so choose one that can handle the gauge of wire you’ll be working with.
- Electrical Tape: This is used to wrap and secure wires, protecting them from moisture and preventing them from coming loose.
- Silicone Caulk: Silicone caulk can be used to seal the holes where wires enter the ground to prevent moisture from seeping in.
- Transformer: Garden lights require a transformer to convert the voltage from 120V to 12V. Make sure to choose the right size transformer for the number of lights you plan to install.
- Garden Stones or Crushed Stone Pack: If you plan to install path lights, you’ll need to lay down garden stones or crushed stone pack to create a stable base for the lights to stand on [2].
- Landscape Fabric: This is used to prevent weeds from growing up around your garden lights and to prevent soil from eroding.
In summary, to install garden lights, you’ll need a garden rake, hand pruners or pruning shears, metal bow rake, shovel, wire cutters, electrical tape, silicone caulk, transformer, garden stones or crushed stone pack, and landscape fabric. With the right tools and materials, you’ll be able to add beautiful and functional lighting to your garden.
Step-By-Step Guide to Installing Garden Lights
Installing garden lights can be a fun and rewarding project that adds both beauty and functionality to your outdoor space. Here is a step-by-step guide to help you through the installation process:
- Plan your layout: Before starting the installation, plan where you want to place the lights and how they will be wired together. Make sure to consider the power source and the distance between lights.
- Gather materials and tools: In addition to the garden lights, you will need a variety of tools and materials, such as a garden spade shovel, a mini round-point shovel, landscape staples, and a voltage tester. Be sure to check the instructions for your specific lights to ensure you have all the necessary items.
- Prepare the area: Clear any debris or obstacles from the area where the lights will be installed. If you need to bury wires, use the garden spade shovel to create a trench.
- Install the lights: Use the mini round-point shovel to dig holes for the light stakes. Place the lights in the holes and secure them with landscape staples. Connect the wires according to the manufacturer’s instructions and use the voltage tester to ensure the power source is turned off before making any connections.
- Test the lights: Once all the lights are installed, turn on the power source and test each light to make sure they are working properly.
Safety Considerations
When working with electricity, it is important to follow safety precautions to prevent injury or damage. Here are a few tips to keep in mind:
- Always turn off the power source before making any connections or adjustments.
- Wear protective gear, such as gloves and safety glasses, to prevent injury.
- If you are not comfortable working with electricity, consider hiring a professional electrician to assist with the installation.
Tips for A Successful Installation
To ensure a successful installation, here are a few tips to consider:
- Take your time and plan ahead to avoid mistakes.
- Use high-quality materials to ensure durability and longevity.
- Follow the manufacturer’s instructions carefully to ensure proper installation and optimal performance.
- Regularly check and maintain the lights to ensure they continue to function properly.
By following these steps and safety considerations, you can install garden lights to enhance the beauty and functionality of your outdoor space.
How to Assemble Your Garden Lights
To assemble your garden lights, you can follow the instructions provided by the manufacturer. Generally, the assembly process will involve the following steps:
- Unpack the lights and check if all the components are included.
- Assemble the lights according to the instructions provided by the manufacturer [2]. This typically requires placing the light top into the support and then attaching the light stake to the bottom of the support.
- If your lights require wiring, dig a shallow trench along the pathway where the wiring will run. Check local codes as most require wiring to be buried at least 6 inches deep [1].
- Stake the lights into the ground and bury the wiring, if necessary.
- For solar lights, expose them to full sun for 12 to 14 hours before starting the installation process [2].
Additionally, consider creative ways to use your garden lights. For instance, you can use globe-shaped lights to make your garden glow. These lights work especially well in gravel gardens or xeriscape landscaping plans. Place the lights along top-tier areas of your garden or behind and underneath plants for spotlight illumination [3].
How to Plan Where to Install Your Garden Lights
To plan where to install your garden lights, follow these steps:
- Draw a sketch of your garden, including all windows and doors. Think about the angles from which you want to view your yard, whether from your home or from the street [3].
- Identify the areas you want to illuminate, such as pathways, garden beds, or outdoor living spaces.
- Determine the distance between the fixtures. As a rule of thumb, the distance between the fixtures should be half the height of the fixture. For example, if the fixture is 12 inches tall, the distance between the fixtures should be 6 feet. However, this can vary depending on the size of the area you want to illuminate and the intensity of the light you want to achieve [3].
- Consider the purpose of the lighting. For instance, if you’re illuminating a pathway, you may want to space the lights closer together to ensure adequate lighting. However, if you’re illuminating a garden bed, you may want to space the lights farther apart to create a more subtle effect.
- Determine the distance of the lights from the walls. As a rule, your garden lights should be between 18 inches to 36 inches from the wall [1].
- For wired garden lights, dig a shallow trench along the pathway where the wiring will run. Check local codes as most require wiring to be buried at least 6 inches deep. Then, stake the lights into the ground and bury the wiring [2].
By following these steps, you can plan where to install your garden lights and how far apart to place the fixtures to create the desired lighting effect in your outdoor space.
Options for powering your garden lights
When it comes to powering your garden lights, there are a few different options to consider. Here are some possibilities:
- Electricity from the house: If you already have exterior outlets on your home, the easiest way to power your garden lights may be to plug them into these outlets. Building codes often require at least one exterior outlet by the front and rear doors of a home, so take advantage of these with a combination of lights and extension cords. [2]
- Wiring: To power your garden lights with electricity from your home, you may need to run wiring from an interior electrical panel or an exterior outlet. This can involve digging a shallow trench along the pathway where the wiring will run, staking the lights into the ground, and burying the wiring. Check local codes, as most require wiring to be buried at least 6 inches deep. [1]
- Solar power: If you prefer not to use electricity from your home to power your garden lights, you may want to consider solar-powered options. These lights store energy from the sun during the day and use it to power the lights at night. To install solar lights, you’ll usually need to assemble the lights according to instructions, place the light top into the support, and attach the light stake to the bottom of the support. Then, expose the solar lights to full sun for 12- to 14 hours before starting installation. [2]
- Independent circuit: If you do choose to power your garden lights with electricity from your home, it’s important to consider safety measures. Ideally, the supply to the garden lighting installation should be an independent circuit with an independent RCD/RCBO so that, if tripping issues do occur, they don’t affect the rest of the installation. This can help ensure that the lighting installation is safe and long-lasting. [3]
How to find a power source for your garden lights
When planning to install garden lights, it’s important to consider the power source for your lights. Here are some options to consider:
- Connect to an existing power source: If there is an exterior outlet on your home, you can use extension cords and plug in your lights directly into the outlet [2]. Alternatively, you can install an exterior extension box and conduit to run wiring from an existing interior outlet [1].
- Use solar power: Solar garden lighting is a sustainable and flexible option that can be integrated into arches, arbors, or even lanterns [3]. Solar lights are powered by the sun and can be placed anywhere in the garden that gets enough sunlight during the day.
- Battery-powered lights: Battery-powered garden lights are another option that doesn’t require any wiring. They are convenient and easy to install, but the batteries will need to be replaced periodically.
When selecting a power source for your garden lights, consider the location of your lights and how much power they will need. If you are unsure about the best power source for your lights, it may be helpful to consult with a licensed electrician.
How to run the low voltage cable for your garden lights
When installing low-voltage garden lighting, running the cable is a crucial step that needs to be done carefully to ensure that it is both functional and safe. Here is a comprehensive guide on how to run the low-voltage cable for your garden lights and how to bury the cable:
Step 1: Find your nearest power source
To get started, you should locate your nearest power source, which will serve as your starting point. Then, place the lights in their desired locations.
Step 2: Run the low-voltage cable
Run the low-voltage cable in a trench from the nearest power source to each light fixture location. Make sure that the trench is deep enough to keep the cable out of harm’s way but not too deep to make it difficult to access in case of maintenance or repair needs.
Step 3: Connect the lights
Once you have run the cable to each light fixture location, connect the lights according to the manufacturer’s instructions.
Step 4: Bury the cable
After connecting the lights, bury the cable by backfilling the trench with soil, making sure that the cable is deep enough to prevent damage from garden tools or foot traffic but not too deep to damage the cable.
It is essential to use low-voltage cables when installing garden lighting to avoid accidents. According to [2], low-voltage cabling is generally used for applications that carry low-voltage electrical signals, such as garden lighting, audio/visual systems, and security systems.
Low-voltage cables carry signals of 50 volts or less, making them safer than high-voltage cables.
To run the cable for your garden lights, you can either run it above ground or bury it. Burying the cable is the most common method used to keep the cable out of harm’s way and to create a cleaner-looking installation. According to [1], when burying the cable, you should run it in a trench that is deep enough to prevent damage from garden tools or foot traffic, but not too deep that it is difficult to access for maintenance or repair.
How to Install Your Garden Lights
Installing garden lights is a great way to add beauty and security to your outdoor space. Here are some tips for properly installing your garden lights.
First, determine where you want to place your lights and make sure you have a power source nearby. Next, if the ground is hard or dry, lightly water the soil along the area where the lights will be installed to make it easier to drive the stakes into the ground [1]. If you plan to bury the wiring, dig a shallow trench (check local codes, as most require wiring to be buried at least 6 inches deep) along the pathway where the wiring for your lights will run. Then stake the lights into the ground and bury the wiring [2].
When installing the fixtures, start by connecting the wires. Attach the bare copper ground wire on the fixture to the bare copper ground wire in the outlet box or to the green grounding screw on the suspension bar. Then connect the white wires using a twist-on wire connector. Next, twist the black wires together with a connector [3].
When you have your fixtures in place, make sure they remain plumb and adjust the angle of the light to get the desired effect. Finally, turn on the lights and check to see if they are positioned correctly and if the effect is what you were hoping for.
Proper installation of garden lights is crucial for their longevity and functionality. Always follow the manufacturer’s instructions for installation and ensure that the wiring is properly installed and protected. With the right installation, you can enjoy beautiful and functional lighting in your garden for years to come.
there is a certain …”
URL: https://www.oreab.com/2019/01/garden-landscape-lighting/
How to Maintain Your Garden Lights
Maintaining your garden lights is important to ensure they continue to function properly and illuminate your outdoor space effectively. Here are some tips on how to maintain your garden lights and troubleshoot common problems:
- Regularly check the power cable and connection points of your garden lights to ensure they are not damaged. If any damage is found, repair or replace the cable immediately to prevent any electrical hazards [1].
- Clean your garden lights regularly to prevent the buildup of dirt and debris. This can be done with a soft, damp cloth or sponge. Be sure to turn off the power before cleaning the lights to avoid any accidents.
- Inspect the bulbs of your garden lights periodically and replace any that are burnt out. This will ensure that your lights continue to provide adequate illumination [3].
- Troubleshoot common problems such as lights not turning on or flickering. One common issue is a tripped GFCI plug. In this case, reset the plug to see if this resolves the issue [2].
- If your garden lights still aren’t working properly, check the cable and connection points for any damage or lose connections. You may also need to check the transformer or power source to ensure it is functioning properly [3].
By following these maintenance tips and troubleshooting common problems, you can ensure that your garden lights continue to function properly and provide effective illumination for your outdoor space.
FAQs
How long do garden lights last?
The lifespan of garden lights can vary depending on the type of bulb being used. LED lights are known to last longer than traditional incandescent bulbs. According to one source, LED lights can last up to 50,000 hours, which is approximately 5 and a half years if left on 24/7 [[1]]. Another source estimates that LED lights can last anywhere from 4 to 6 years [[2]].
What is the best type of bulb for garden lights?
LED bulbs are the most energy-efficient and long-lasting option for garden lights. They use less electricity than traditional bulbs and can last up to 50,000 hours [[1]]. Additionally, they are available in a range of colors and can be dimmed for more versatility.
Can garden lights be used indoors?
While garden lights are designed for outdoor use, there is no reason they can’t be used indoors. However, it’s important to note that certain types of outdoor lights, such as floodlights, maybe too bright for indoor use and could cause discomfort or eye strain. It’s always a good idea to check the manufacturer’s specifications before using garden lights indoors.
What is the best type of bulb for garden lights?
LED bulbs are the most energy-efficient and long-lasting option for garden lights. They use less electricity than traditional bulbs and can last up to 50,000 hours [[1]]. Additionally, they are available in a range of colors and can be dimmed for more versatility.
Can I install garden lights myself, or do I need to hire a professional?
It is possible to install garden lights yourself, but it’s important to follow local codes and regulations regarding electrical work. If you are not comfortable working with electricity or don’t have experience with outdoor electrical work, it’s recommended to hire a professional electrician to ensure the installation is safe and up to code.
Do garden lights require a lot of electricity?
LED garden lights are designed to use less electricity than traditional bulbs. They are also available with features such as motion sensors or timers to help conserve energy. However, it’s important to choose the right type of light for your needs and to ensure that the installation is done correctly to avoid any potential safety hazards.
Conclusion on How to install garden lights
Installing garden lights requires careful planning and execution to ensure a safe and effective result. Basic steps include digging a trench for wiring and staking the lights into the ground while selecting the right lighting fittings and ensuring independent circuits can help to maximize the longevity of the installation [1][2].
To minimize disruption to your lawn, it’s recommended to turn over the sod and fold it over the area where the trench will be dug [3]. It’s also important to regularly maintain and troubleshoot garden lights to ensure they continue to work properly.
Common issues include damaged cables, GFCI plugs, and faulty light fixtures [1][2][3]. By following proper installation and maintenance guidelines, you can enjoy the benefits of beautiful garden lighting for years to come.